1. 使用TCP发送日志
应用场景:生产中有缺少的日志或部分日志需要加入es
1.1 编辑tcp.conf
[root@linux-node2 conf.d]# cat tcp.conf
input {
    tcp {
    type => "tcp"
    port => "6666"      #监听端口
    mode => "server"    #server端
    }
}

output {
    stdout {
    codec => rubydebug
    }
}
#启动logstach收集tcp传过来的数据
[root@linux-node2 conf.d]/opt/logstash/bin/logstash -f /etc/logstash/conf.d/tcp.conf
1.2 使用nc通过tcp向node2发送数据
[root@linux-node1 /var/log/kibana]# yum install -y nc
#发送数据
[root@linux-node1 /var/log/kibana]# echo "haha" | nc 192.168.56.12 6666
#发送文件
[root@linux-node1 /var/log/kibana]# nc 192.168.56.12 6666 < /etc/resolv.conf
1.3 启动logstash,查看界面输出结果
[root@linux-node2 conf.d]# /opt/logstash/bin/logstash -f /etc/logstash/conf.d/tcp.conf
Settings: Default pipeline workers: 1
Pipeline main started
{
       "message" => "haha",
      "@version" => "1",
    "@timestamp" => "2017-03-26T11:57:30.974Z",
          "host" => "192.168.56.11",
          "port" => 35944,
          "type" => "tcp"
}
{
       "message" => "# Generated by NetworkManager",
          "@version" => "1",
        "@timestamp" => "2017-03-26T11:58:29.739Z",
              "host" => "192.168.56.11",
              "port" => 36041,
              "type" => "tcp"
    }
    {
           "message" => "search example.com",
          "@version" => "1",
        "@timestamp" => "2017-03-26T11:58:29.739Z",
              "host" => "192.168.56.11",
              "port" => 36041,
              "type" => "tcp"
    }
    {
           "message" => "nameserver 192.168.56.2",
          "@version" => "1",
        "@timestamp" => "2017-03-26T11:58:29.750Z",
              "host" => "192.168.56.11",
              "port" => 36041,
              "type" => "tcp"
    }

[root@linux-node2 ~]# netstat -tunpl|grep 6666
tcp6       0      0 :::6666                 :::*                    LISTEN      8685/java
1.4 伪设备发送方式
[root@linux-node1 /var/log/kibana]# echo "hehe" > /dev/tcp/192.168.56.12/6666
{
       "message" => "hehe",
      "@version" => "1",
    "@timestamp" => "2017-03-26T12:00:18.474Z",
          "host" => "192.168.56.11",
          "port" => 36216,
          "type" => "tcp"
}
2. rsyslog收集
logstash监听rsyslog 514端口收集日志
2.1 编辑node1上rsyslog配置文件,让rsyslog向node2 514端口传送日志
[root@linux-node1 ~]# tail -2 /etc/rsyslog.conf | head -1
*.* @@192.168.56.12:514

[root@linux-node2 conf.d]# /opt/logstash/bin/logstash -f /etc/logstash/conf.d/syslog.conf
Settings: Default pipeline workers: 1
Pipeline main started
{
           "message" => "[origin software=\"rsyslogd\" swVersion=\"7.4.7\" x-pid=\"4507\" x-info=\"http://www.rsyslog.com\"] start\n",
          "@version" => "1",
        "@timestamp" => "2017-03-26T11:32:41.000Z",
              "type" => "system-syslog",
              "host" => "192.168.56.11",
          "priority" => 46,
         "timestamp" => "Mar 26 19:32:41",
         "logsource" => "linux-node1",
           "program" => "rsyslogd",
          "severity" => 6,
          "facility" => 5,
    "facility_label" => "syslogd",
    "severity_label" => "Informational"
}
......

[root@linux-node1 /var/log/kibana]# systemctl restart rsyslog
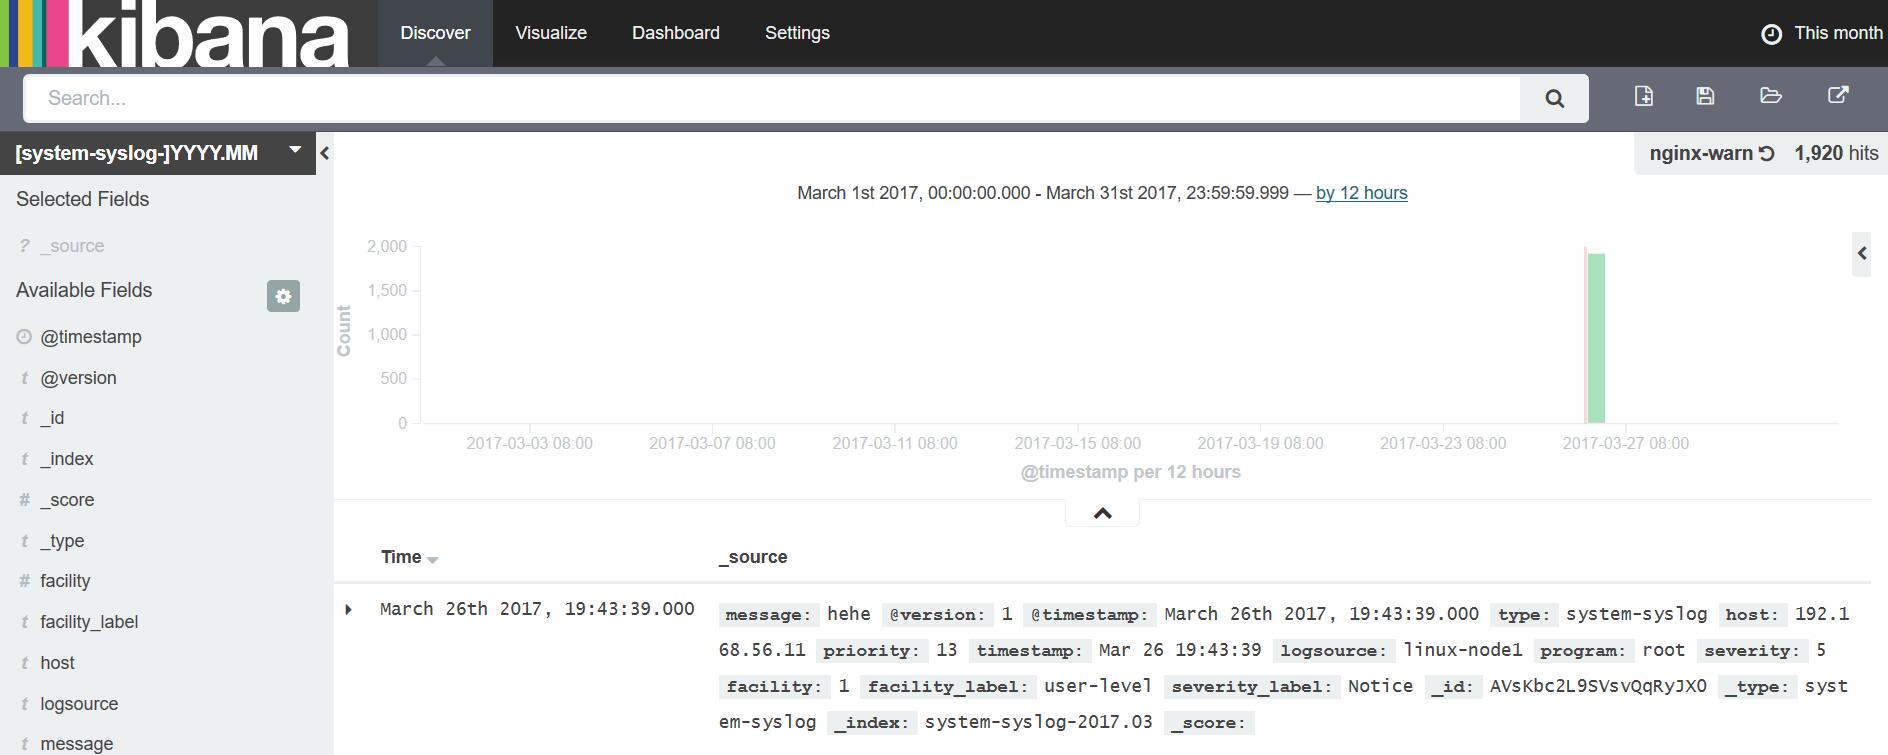
[root@linux-node1 /var/log/kibana]# logger hehe     #es没索引显示多执行几次
{
           "message" => "hehe\n",
          "@version" => "1",
        "@timestamp" => "2017-03-26T11:33:30.000Z",
              "type" => "system-syslog",
              "host" => "192.168.56.11",
          "priority" => 13,
         "timestamp" => "Mar 26 19:33:30",
         "logsource" => "linux-node1",
           "program" => "root",
          "severity" => 5,
          "facility" => 1,
    "facility_label" => "user-level",
    "severity_label" => "Notice"
}
{
           "message" => "[euid=root]:root pts/0 2017-03-26 18:19 (192.168.56.1):[/var/log/kibana]2017-03-26 19:33:30 root logger hehe\n",
          "@version" => "1",
        "@timestamp" => "2017-03-26T11:33:30.000Z",
              "type" => "system-syslog",
              "host" => "192.168.56.11",
          "priority" => 13,
         "timestamp" => "Mar 26 19:33:30",
         "logsource" => "linux-node1",
           "program" => "root",
          "severity" => 5,
          "facility" => 1,
    "facility_label" => "user-level",
    "severity_label" => "Notice"
}
2.2 编辑syslog.conf文件
[root@linux-node2 conf.d]# cat syslog.conf
input {
    syslog {
    type => "system-syslog"
    port => 514     #字符串要用双引号引起来
    }
}

output {
    elasticsearch {    #写入es
    hosts => ["192.168.56.12:9200"]
    index => "system-syslog-%{+YYYY.MM}"
    }
}
#启动logstach收集rsyslog
[root@linux-node2 conf.d]# /opt/logstash/bin/logstash -f /etc/logstash/conf.d/syslog.conf
[root@linux-node2 ~]# netstat -tunpl|grep 514
tcp6       0      0 :::514                  :::*                    LISTEN      8818/java
udp6       0      0 :::514                  :::*                                8818/java

#在node1上使用logger命令发送日志
[root@linux-node1 /var/log/kibana]# logger hehe
[root@linux-node1 /var/log/kibana]# logger hehe
...
2.3 查看结果
3. Apache日志收集
3.1 filter grok插件使用
grok会对收集进来的事件进行过滤,字段拆分
#启动apache
[root@linux-node1 /var/log/httpd]# systemctl start httpd
#编辑grok.conf文件
[root@linux-node1 /etc/logstash/conf.d]# cat grok.conf
input {
    stdin {}
}

filter {
     grok {
    match => { "message" => "%{IP:client} %{WORD:method} %{URIPATHPARAM:request} %{NUMBER:bytes} %{NUMBER:duration}" }
  }
}

output {
    stdout {
    codec => rubydebug
}
}
#查看结果
[root@linux-node1 ~]# /opt/logstash/bin/logstash -f /etc/logstash/conf.d/grok.conf
Settings: Default pipeline workers: 2
Pipeline main started
55.3.244.1 GET /index.html 15824 0.043
{
       "message" => "55.3.244.1 GET /index.html 15824 0.043",
      "@version" => "1",
    "@timestamp" => "2017-03-26T12:26:35.731Z",
          "host" => "linux-node1.example.com",
        "client" => "55.3.244.1",
        "method" => "GET",
       "request" => "/index.html",
         "bytes" => "15824",
      "duration" => "0.043"
}
grok插件缺点:
grok正则匹配影响机器性能
不灵活,除非很懂ruby
生产中建议使用python脚本做正则过滤:
logstash --> redis --> python脚本(多进程) --> es
3.2 收集apache日志
[root@linux-node1 /etc/logstash/conf.d]# cat apache.conf
input {
    file {
    path => "/var/log/httpd/access_log"
    start_position => "beginning"
}
}

    match => { "message" => "%{COMBINEDAPACHELOG}" }
    }
}

output {
    elasticsearch
filter {
    grok { {
    hosts => ["192.168.56.11:9200"]
    index => "apache-access-log-%{+YYYY.MM.dd}"
    }
}

[root@linux-node1 /etc/logstash/conf.d]# /opt/logstash/bin/logstash -f /etc/logstash/conf.d/apache.conf
Settings: Default pipeline workers: 2
Pipeline main started
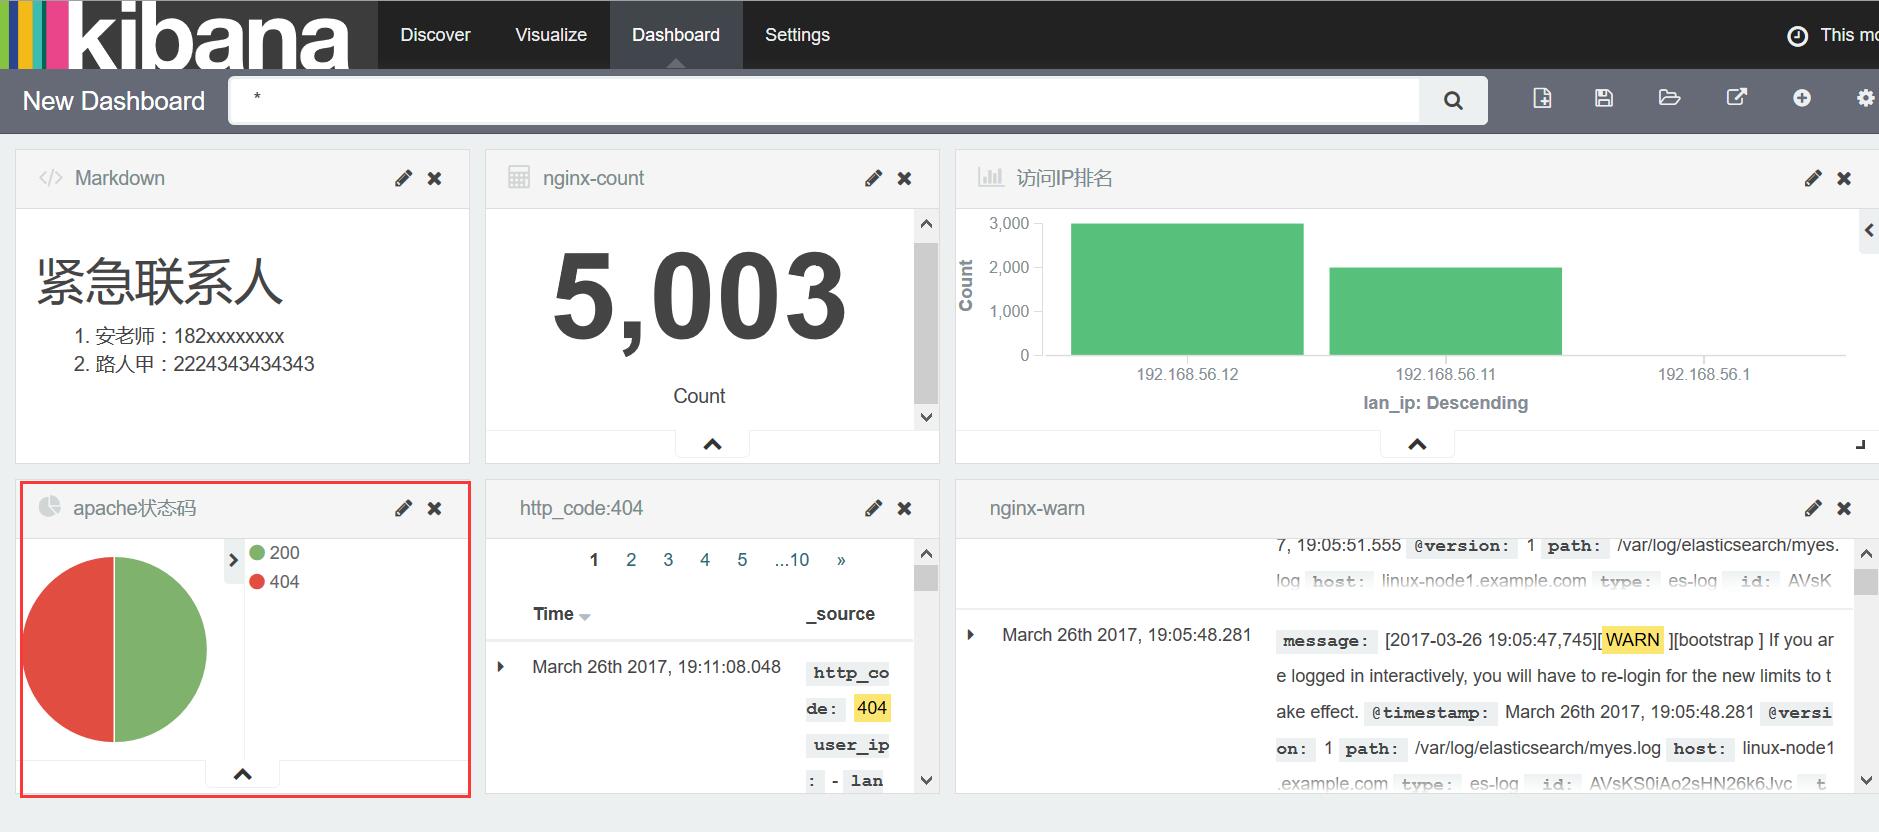
3.1 查看结果,饼图显示
[root@linux-node1 ~]# ab -n 1000 -c 1 http://192.168.56.11/
[root@linux-node1 ~]# ab -n 1000 -c 1 http://192.168.56.11/dffdf

