1. 收集java日志
1.1 logstash-type-if判断使用
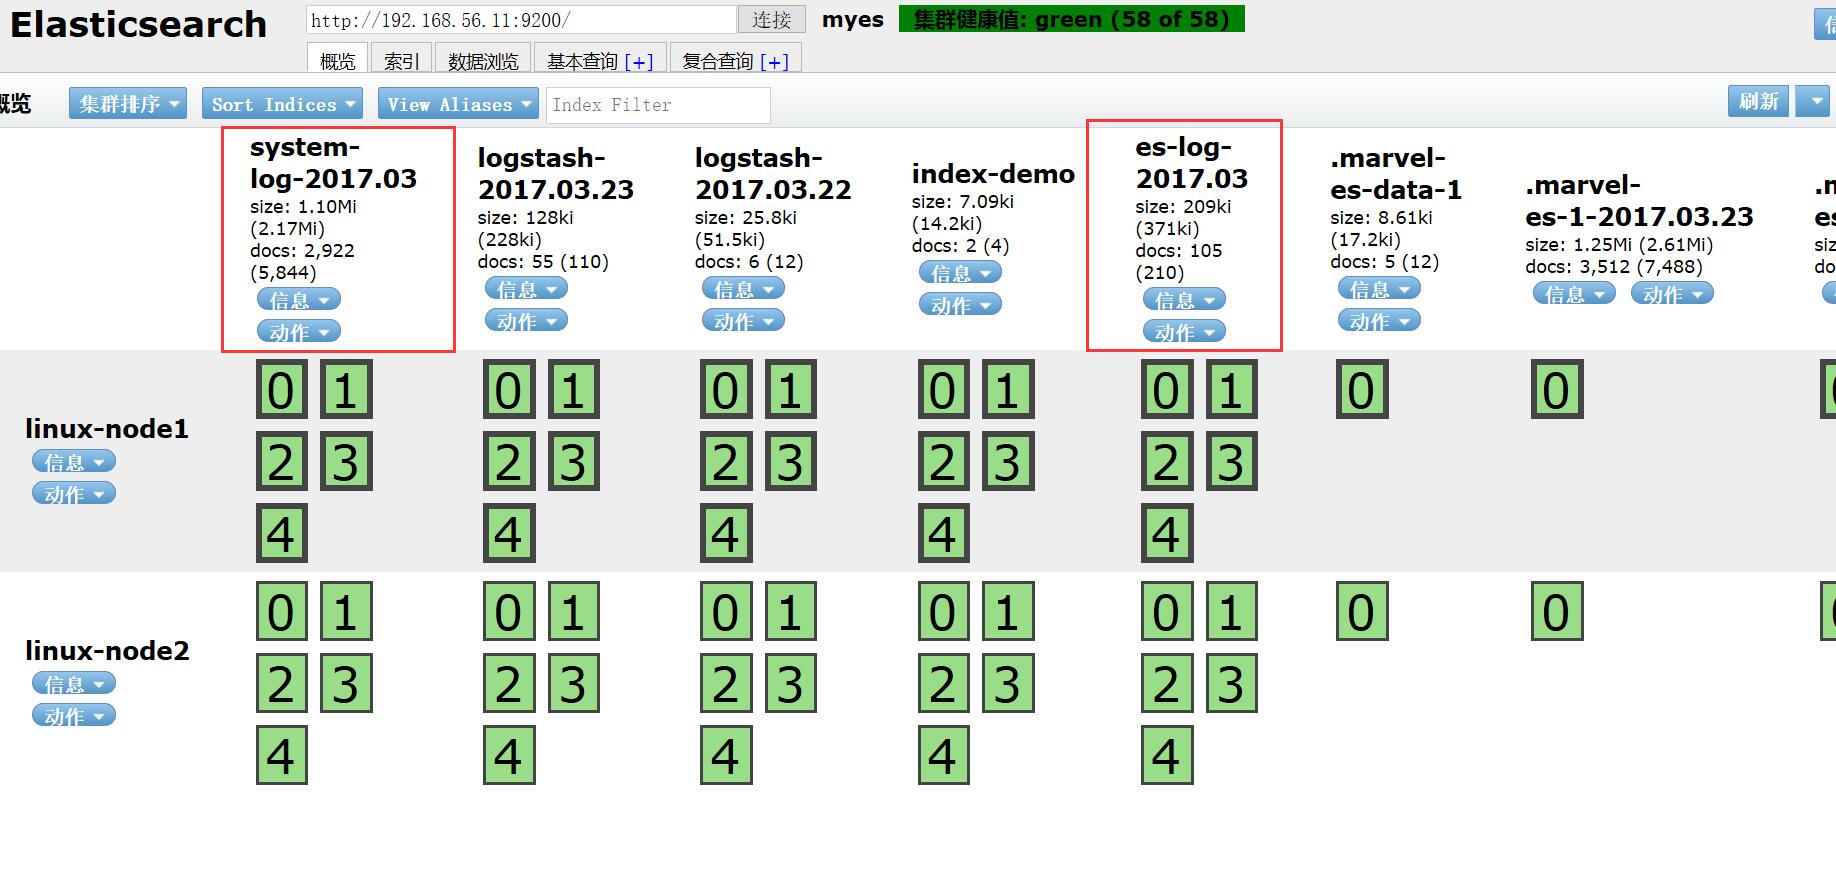
#通过type字段来做if判断,不同日志写入不同的索引
[root@linux-node1 ~]# cat /etc/logstash/conf.d/file.conf
input{
    file{
    path => ["/var/log/messages","/var/log/secure"]
    type => "system-log"
    start_position => "beginning"
    }
    file{
    path => "/var/log/elasticsearch/myes.log"
    type => "es-log"
    start_position => "beginning"
    codec => multiline{
      pattern => "^\["
      negate => true
      what => "previous"
    }
    }

}

filter{

}

output{
  if [type] == "system-log" {
    elasticsearch {
        hosts => ["192.168.56.11:9200"]
        index => "system-log-%{+YYYY.MM}"
    }
  }
  if [type] == "es-log" {
    elasticsearch {
        hosts => ["192.168.56.11:9200"]
        index => "es-log-%{+YYYY.MM}"
    }
  }
}

[root@linux-node1 ~]# /opt/logstash/bin/logstash -f /etc/logstash/conf.d/file.conf
Settings: Default pipeline workers: 2
Pipeline main started
1.2 查看结果
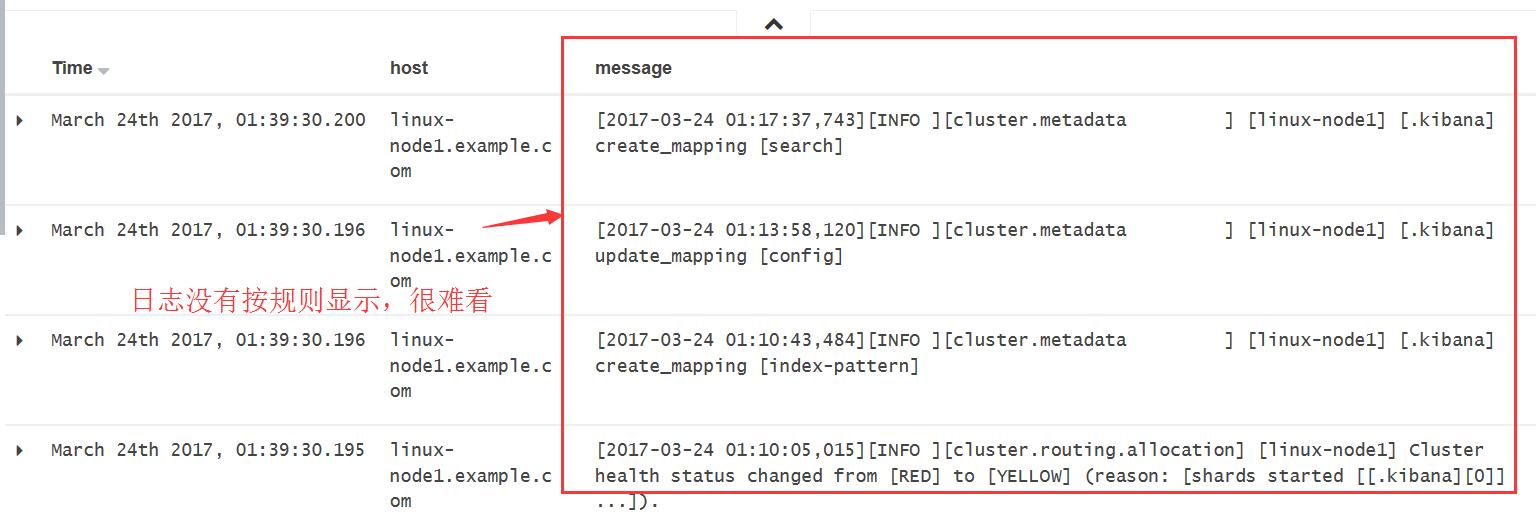
然而,Java日志显示格式很难看
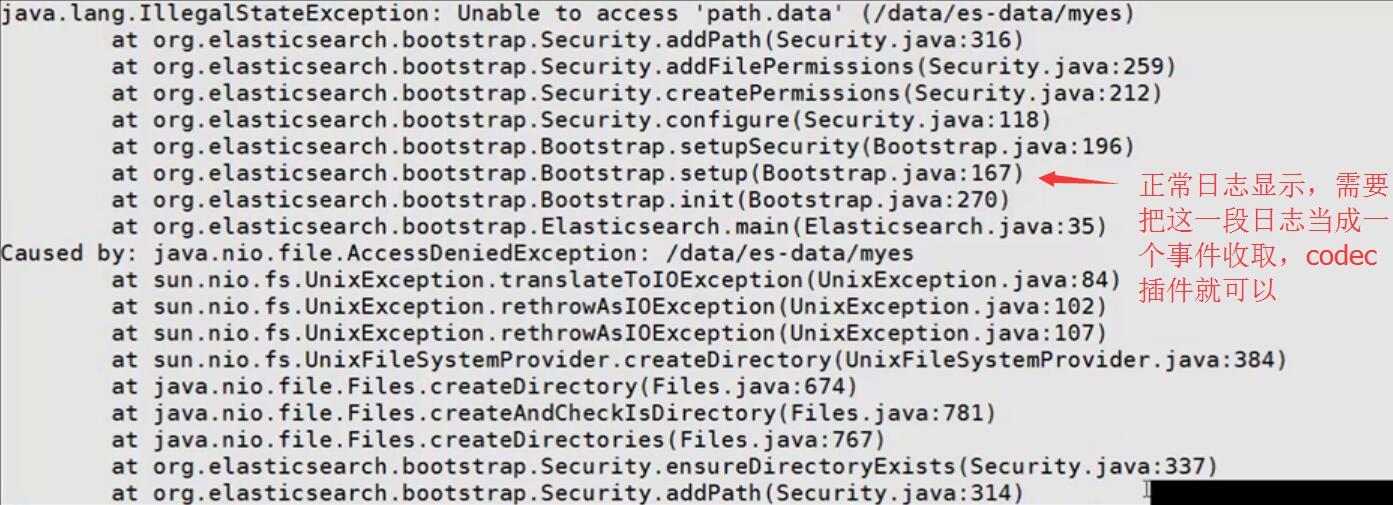
1.3 使用codec插件定义事件
[root@linux-node1 ~]# cat /etc/logstash/conf.d/codec.conf
input{
    stdin {
    codec => multiline{
      pattern => "^\["  #只要遇到[就当前一个新的事件
      negate => true
      what => "previous"
    }
    }
}

filter{
}

output{
    stdout{
        codec => rubydebug
    }
}


[root@linux-node1 ~]# /opt/logstash/bin/logstash -f /etc/logstash/conf.d/codec.conf
Settings: Default pipeline workers: 2
Pipeline main started
[fdfd
[fdf
{
    "@timestamp" => "2017-03-23T18:05:24.082Z",
       "message" => "[fdfd",
      "@version" => "1",
          "host" => "linux-node1.example.com"
}
dfdfdfd
fdfddellfd
[
{
    "@timestamp" => "2017-03-23T18:05:40.345Z",
       "message" => "[fdf\ndfdfdfd\nfdfddellfd",
      "@version" => "1",
          "tags" => [
        [0] "multiline"
    ],
          "host" => "linux-node1.example.com"
}
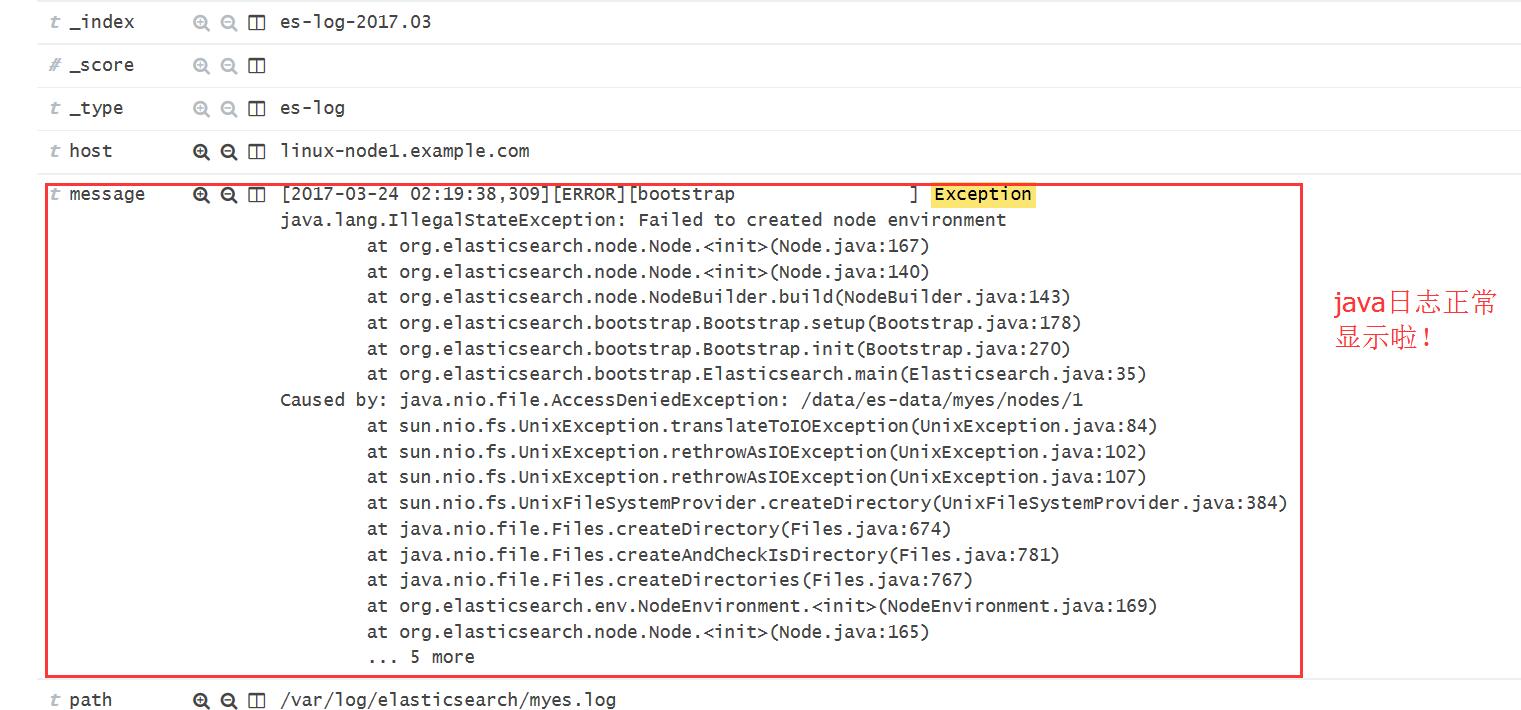
1.4 Kibana显示Java日志
#修改file.conf
[root@linux-node1 ~]# vi /etc/logstash/conf.d/file.conf
input{
    file{
        path => ["/var/log/messages","/var/log/secure"]
        type => "system-log"
        start_position => "beginning"
    }
    file{
        path => "/var/log/elasticsearch/myes.log"
        type => "es-log"
        start_position => "beginning"
        codec => multiline{
          pattern => "^\["
          negate => true
          what => "previous"
        }
    }

}

[root@linux-node1 ~]# ls -a .sin*
.sincedb_1fb922e15ccea4ac0d028d33639ba3ea  .sincedb_a9b9fed7edff6fd888ffe131a05b5397
[root@linux-node1 ~]# cat .sincedb_1fb922e15ccea4ac0d028d33639ba3ea
793841 0 64768 298751
793842 0 64768 3298
[root@linux-node1 ~]# ls -li /var/log/messages
793841 -rw------- 1 root root 302244 Mar 24 02:10 /var/log/messages

#在es上把es-log索引删除,重新收集
[root@linux-node1 ~]# /opt/logstash/bin/logstash -f /etc/logstash/conf.d/file.conf
1.5 查看效果
2. 收集nginx访问日志
2.1 修改nginx访问日志输出格式为json格式
[root@linux-node2 ~]# cat /usr/local/nginx/conf/nginx.conf
log_format  access_log_json  '{"user_ip":"$http_x_real_ip","lan_ip":"$remote_addr","log_time":"$time_iso8601","user_req":"$request","http_code":"$status","body_bytes_sent":"$body_bytes_sent","req_time":"$request_time","user_ua":"$http_user_agent"}';
[root@linux-node2 nginx]# systemctl start nginx
#测试,1000次连接,1个并发
[root@linux-node2 nginx]# ab -n 1000 -c 1 http://192.168.56.12:8080/
2.2 查看nginx日志输出格式
[root@linux-node2 ~]# tail -5 /var/log/nginx/access_log_json.log
{"user_ip":"-","lan_ip":"192.168.56.12","log_time":"2017-03-24T02:44:19+08:00","user_req":"GET / HTTP/1.0","http_code":"200","body_bytes_sent":"631","req_time":"0.000","user_ua":"ApacheBench/2.3"}
{"user_ip":"-","lan_ip":"192.168.56.12","log_time":"2017-03-24T02:44:19+08:00","user_req":"GET / HTTP/1.0","http_code":"200","body_bytes_sent":"631","req_time":"0.000","user_ua":"ApacheBench/2.3"}
{"user_ip":"-","lan_ip":"192.168.56.12","log_time":"2017-03-24T02:44:19+08:00","user_req":"GET / HTTP/1.0","http_code":"200","body_bytes_sent":"631","req_time":"0.000","user_ua":"ApacheBench/2.3"}
{"user_ip":"-","lan_ip":"192.168.56.12","log_time":"2017-03-24T02:44:19+08:00","user_req":"GET / HTTP/1.0","http_code":"200","body_bytes_sent":"631","req_time":"0.001","user_ua":"ApacheBench/2.3"}
{"user_ip":"-","lan_ip":"192.168.56.12","log_time":"2017-03-24T02:44:19+08:00","user_req":"GET / HTTP/1.0","http_code":"200","body_bytes_sent":"631","req_time":"0.001","user_ua":"ApacheBench/2.3"}
2.3 编辑收集nginx访问日志logstash配置文件
[root@linux-node2 conf.d]# cat nginx.conf
input{
    file {
    path => "/var/log/nginx/access_log_json.log"
    codec => "json"
        type => "nginx-access-log"
    }
}

filter{
}

output{
#    stdout{
#     codec => rubydebug
#   }
     elasticsearch {
        hosts => ["192.168.56.11:9200"]
    index => "nginx-access-log-%{+YYYY.MM.dd}"
    }
}
#启动logstash收集nginx访问日志
[root@linux-node2 conf.d]# /etc/init.d/logstash start
logstash is already running

#logstash会根据文件inode记录去找相应日志文件
[root@linux-node2 logstash]# cat /var/lib/logstash/.sincedb_79929b4271e205874b942fde4119e723
0 0 0 0
71850698 0 64768 197000
[root@linux-node2 logstash]# ls -li /var/log/nginx/access_log_json.log
71850698 -rw-r--r-- 1 root root 197000 Mar 24 02:44 /var/log/nginx/access_log_json.log
2.4 查看结果
2.5 Kibana简单查询使用示例
Examples:
Find requests that contain the number 200, in any field:

200

Or we can search in a specific field. Find 200 in the status field:

status:200

Find all status codes between 400-499:

status:[400 TO 499]

Find status codes 400-499 with the extension php:

status:[400 TO 499] AND extension:PHP

Or HTML

status:[400 TO 499] AND (extension:php OR extension:html)
参考:


