1. ELKStack使用消息队列
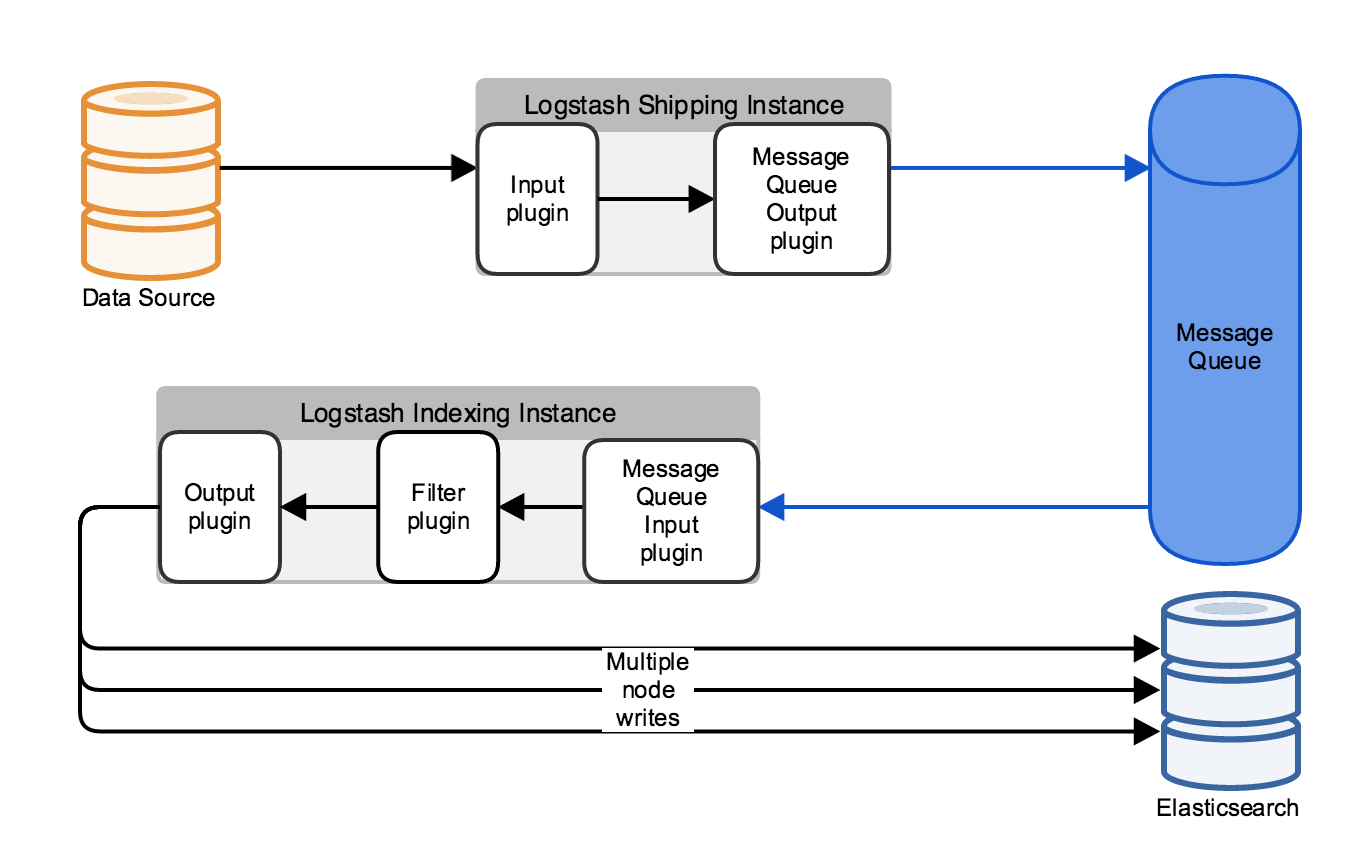
生产中应用:解耦,松耦合
数据 --> logstash(可选,如flume) --> MQ(redis、rabbitmq、kafka、zeromq) --> logstash(可选,Python、Php) --> ES
消息队列扩展架构图
2. redis使用
2.1 安装配置redis
[root@linux-node2 conf.d]# yum install -y redis
[root@linux-node2 conf.d]# sed -i 's/daemonize no/daemonize yes/g' /etc/redis.conf  #设置redis后台启动
[root@linux-node2 conf.d]# sed -i 's/bind 127.0.0.1/bind 192.168.56.12/g' /etc/redis.conf   #更改绑定地址
[root@linux-node2 conf.d]# systemctl start redis        #启动redis
[root@linux-node2 conf
.d]# netstat -tunpl |grep 6379
tcp        0      0 182.168.56.12:6379      0.0.0.0:*               LISTEN      9623/redis-server 1
#连接redis
[root@linux-node2 conf.d]# redis-cli -h 192.168.56.12 -p 6379
192.168.56.12:6379>
192.168.56.12:6379> set name hehe
OK
192.168.56.12:6379> get name
"hehe"
2.2 logstash写入到redis
[root@linux-node2 conf.d]# cat redis.conf
input {
    stdin {}
}

output {
    redis {
    host => "192.168.56.12"
    port => "6379"
    db => "6"
    data_type => "list"     #list类型
    key => "demo"
    }
}

[root@linux-node2 conf.d]# /opt/logstash/bin/logstash -f /etc/logstash/conf.d/redis.conf
Settings: Default pipeline workers: 1
Pipeline main started
111111111111
22222222222222
fdfdf
r3erkfde

192.168.56.12:6379[6]> select 6
OK
192.168.56.12:6379[6]> keys *
1) "demo"
192.168.56.12:6379[6]> type demo
list
192.168.56.12:6379[6]> llen demo
(integer) 4
192.168.56.12:6379[6]> lindex demo -1
"{\"message\":\"r3erkfde\",\"@version\":\"1\",\"@timestamp\":\"2017-03-26T17:53:49.404Z\",\"host\":\"linux-node2.example.com\"}"
2.3 logstash读取apache日志写入到Redis
[root@linux-node1 /etc/logstash/conf.d]# cat redis.conf
input {
    file {
    path => "/var/log/httpd/access_log"
    start_position => "beginning"
    }
}

output {
    redis {
    host => "192.168.56.12"
    port => "6379"
    db => "6"
    data_type => "list"
    key => "apache-access-log"
    }
}


[root@linux-node1 /etc/logstash/conf.d]# /opt/logstash/bin/logstash -f redis.conf
Settings: Default pipeline workers: 2
Pipeline main started

192.168.56.12:6379[6]> keys *
1) "apache-access-log"
2) "demo"
192.168.56.12:6379[6]> llen apache-access-log
(integer) 16
192.168.56.12:6379[6]> lindex apache-access-log -1
"{\"message\":\"192.168.56.1 - - [27/Mar/2017:02:07:39 +0800] \\\"GET / HTTP/1.1\\\" 304 - \\\"-\\\" \\\"Mozilla/5.0 (Windows NT 10.0; WOW64; rv:39.0) Gecko/20100101 Firefox/39.0\\\"\",\"@version\":\"1\",\"@timestamp\":\"2017-03-26T18:07:40.550Z\",\"path\":\"/var/log/httpd/access_log\",\"host\":\"linux-node1.example.com\"}"
3. Logstash读取redis数据写入ES
3.1 ELK使用redis消息队列
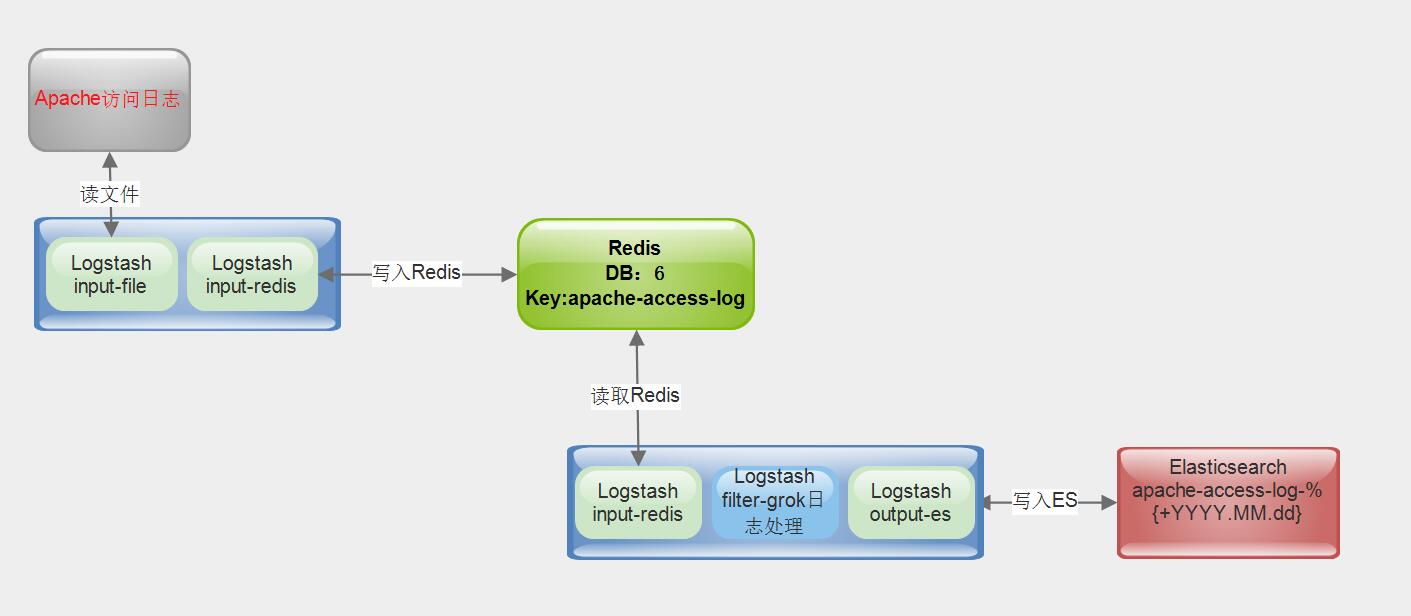
56.11 logstash(output)[写入redis] --> 56.12 redis db:6 key:apache-access-log <-- 56.12 logstash(input)[读redis,filter grok处理日志] --> 56.11 Elasticsearch[写入es] --> Kibana展示
3.2 编辑logstash配置文件
[root@linux-node2 conf.d]# cat redis.conf
input {
    redis {
    host => "192.168.56.12"
    port => "6379"
    db => "6"
    data_type => "list"
    key => "apache-access-log"
    }
}

filter {
    grok {
    match => { "message" => "%{COMBINEDAPACHELOG}" }
    }
}

output {
    elasticsearch {
    hosts => ["192.168.56.11:9200"]
    index => "apache-access-log-%{+YYYY.MM.dd}"
    }
}

[root@linux-node2 conf.d]# /opt/logstash/bin/logstash -f redis.conf
Settings: Default pipeline workers: 1
Pipeline main started
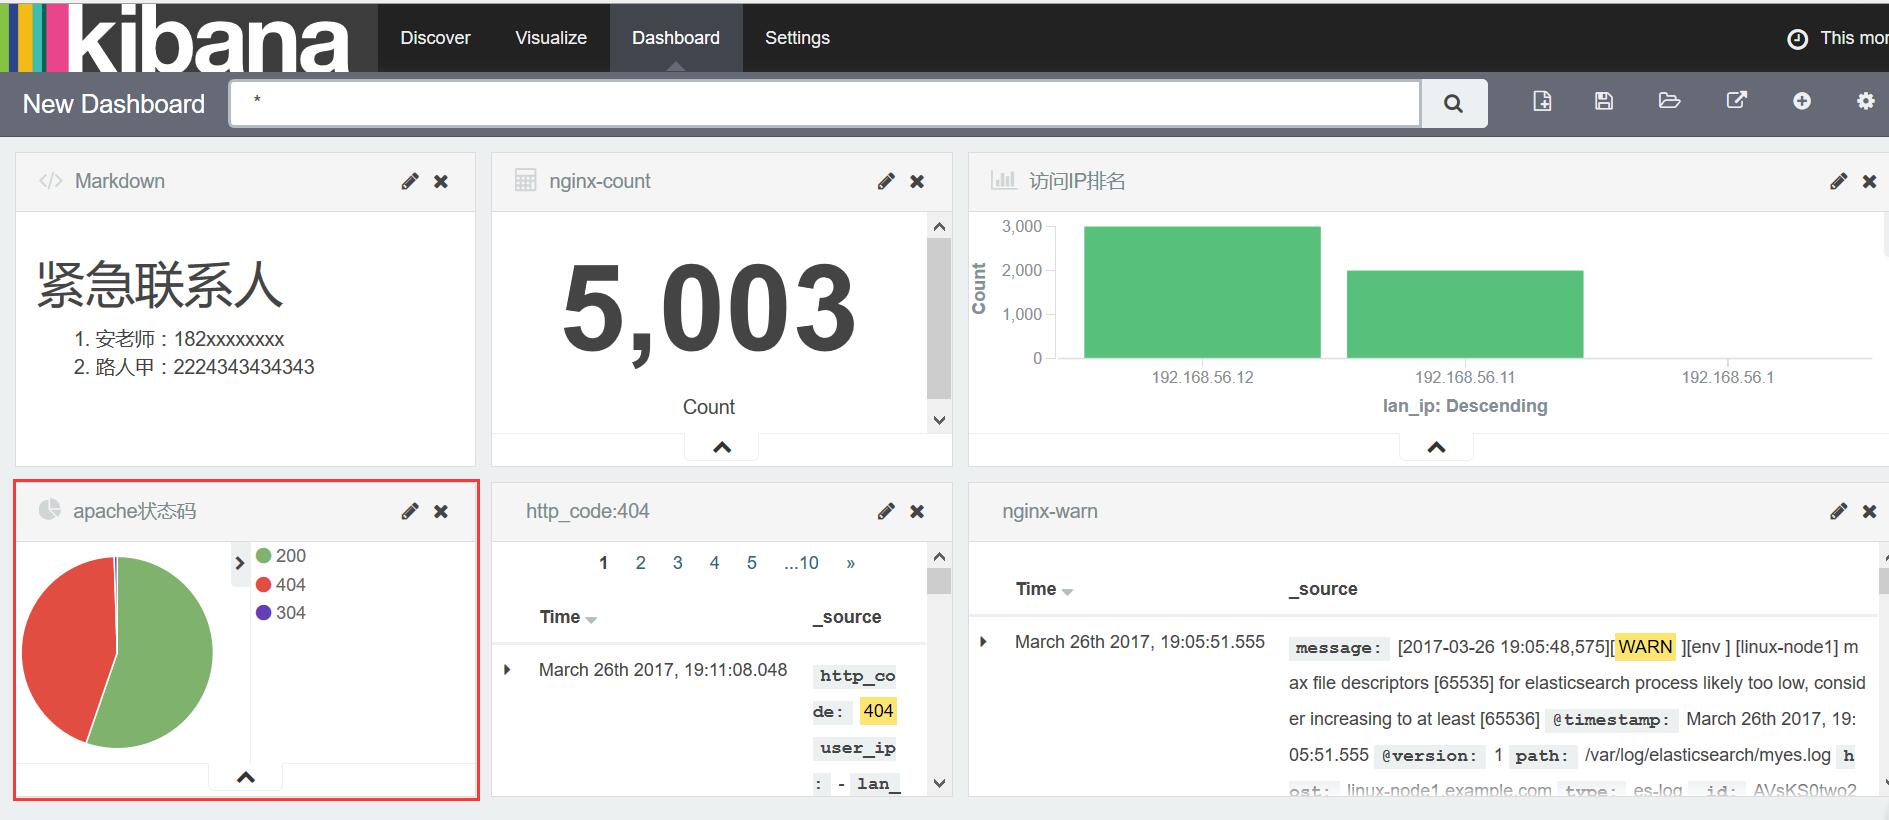
3.3 查看结果
[root@linux-node1 /etc/logstash/conf.d]# ab -n 500 c 1 http://192.168.56.11/


