1. 生产中的监控痛点
1.监控主机多,性能瓶颈,延迟大
2.多机房,防火墙限制
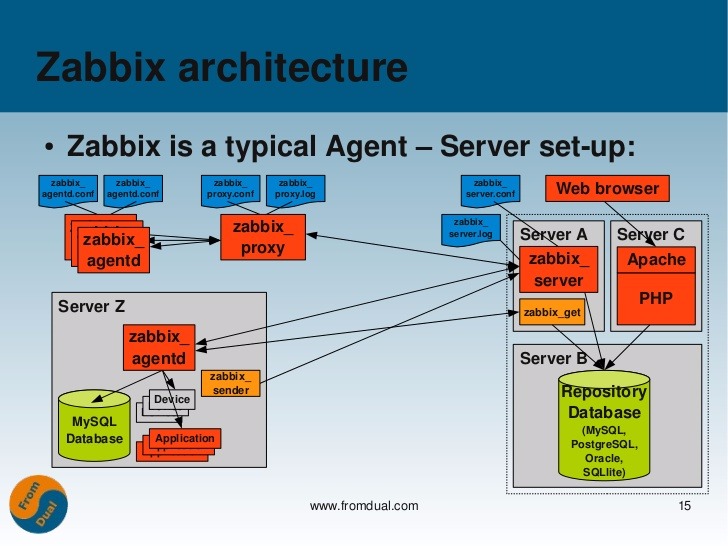
这个时候该Zabbix的监控模式闪亮登场啦!(下图为Zabbix监控架构)
2. Zabbix监控模式
1.被动模式(Agent)
server向agent请求获取监控项的数据,agent返回数据
2.主动模式(Active)
agent请求server获取主动的监控项列表,并主动将监控项内需要检测的数据提交给server/proxy
使用主动模式条件
1.Queue里有大量延迟的item
2.当监控主机超过300+,建议使用(经验值)
3. Zabbix主动模式配置
1.修改agent配置文件
[root@linux-node2 ~]# egrep -v "^#|^$" /etc/zabbix/zabbix_agentd.conf
PidFile=/var/run/zabbix/zabbix_agentd.pid
LogFile=/var/log/zabbix/zabbix_agentd.log
LogFileSize=0
StartAgents=0    #可设为0,关闭被动模式,不再需要监听tcp端口,只要机器能连上网络上的监控主机就能被监控
ServerActive=192.168.56.11		#也可以是域名只要能通,默认连接端口为10051,也可指定
Hostname=linux-node2.example.com	#本机唯一标识,主机根据hostname来识别,也可以配置HostnameItem来标识,建议要设定上
Include=/etc/zabbix/zabbix_agentd.d/*.conf
[root@linux-node2 ~]# systemctl restart zabbix-agent     #配置完后重启agent生效
[root@linux-node2 ~]# tailf /var/log/zabbix/zabbix_agentd.log
5793:20170314:071217.437 **** Enabled features ****
5793:20170314:071217.437 IPv6 support:          YES
5793:20170314:071217.437 TLS support:           YES
5793:20170314:071217.437 **************************
5793:20170314:071217.437 using configuration file: /etc/zabbix/zabbix_agentd.conf
5793:20170314:071217.437 agent #0 started [main process]
5794:20170314:071217.441 agent #1 started [collector]
5795:20170314:071217.441 agent #2 started [active checks #1]
5795:20170314:071217.450 no active checks on server [192.168.56.11:10051]: host [linux-node2.example.com] not found
5795:20170314:071417.526 no active checks on server [192.168.56.11:10051]: host [linux-node2.example.com] not found
#agent启动后会主动连接server端,等待分配任务,但由于server端没有配置,会提示找不到agent主机
2.添加主动模式模版
1.打开Template OS Linux模版 ==>full clone ==> 创建一个名为Template OS Linux Active模版
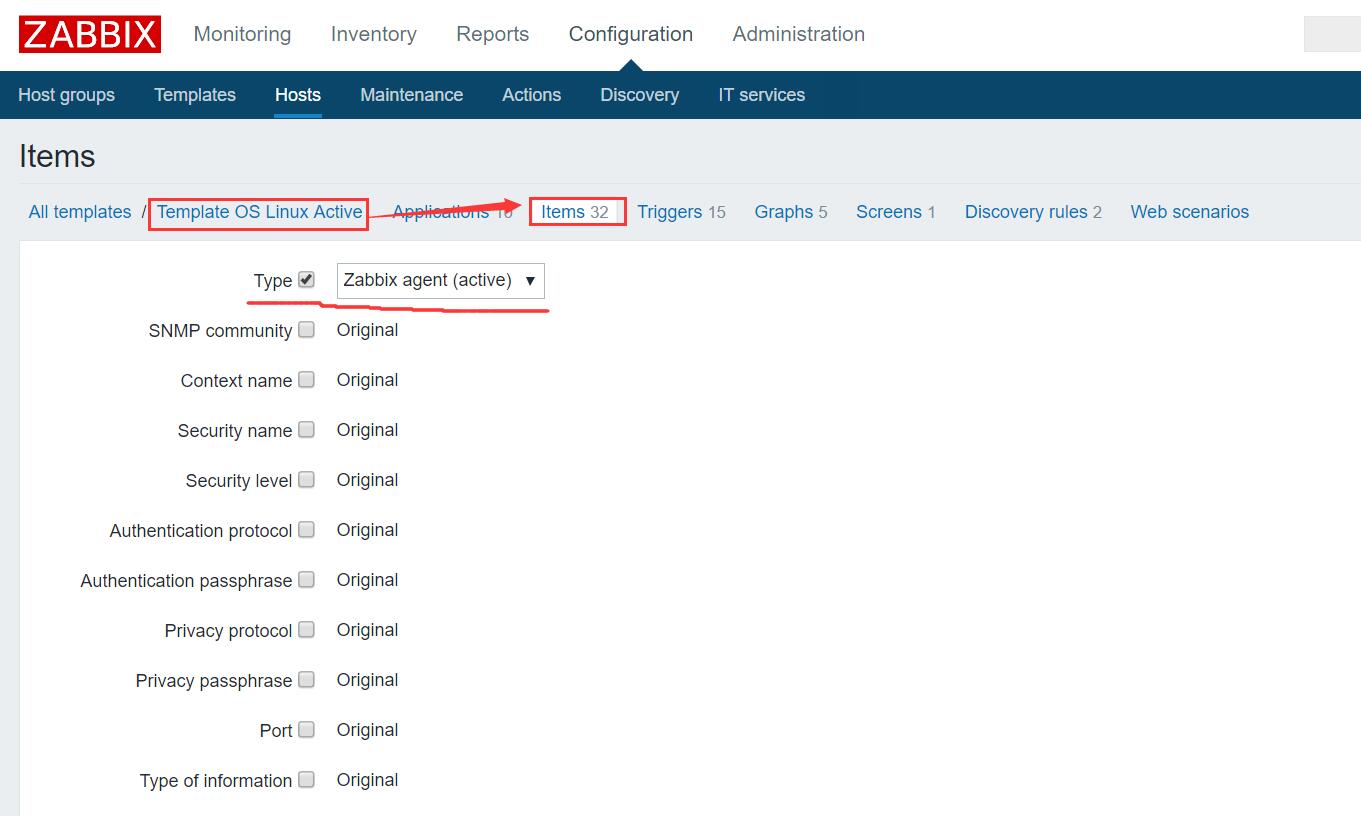
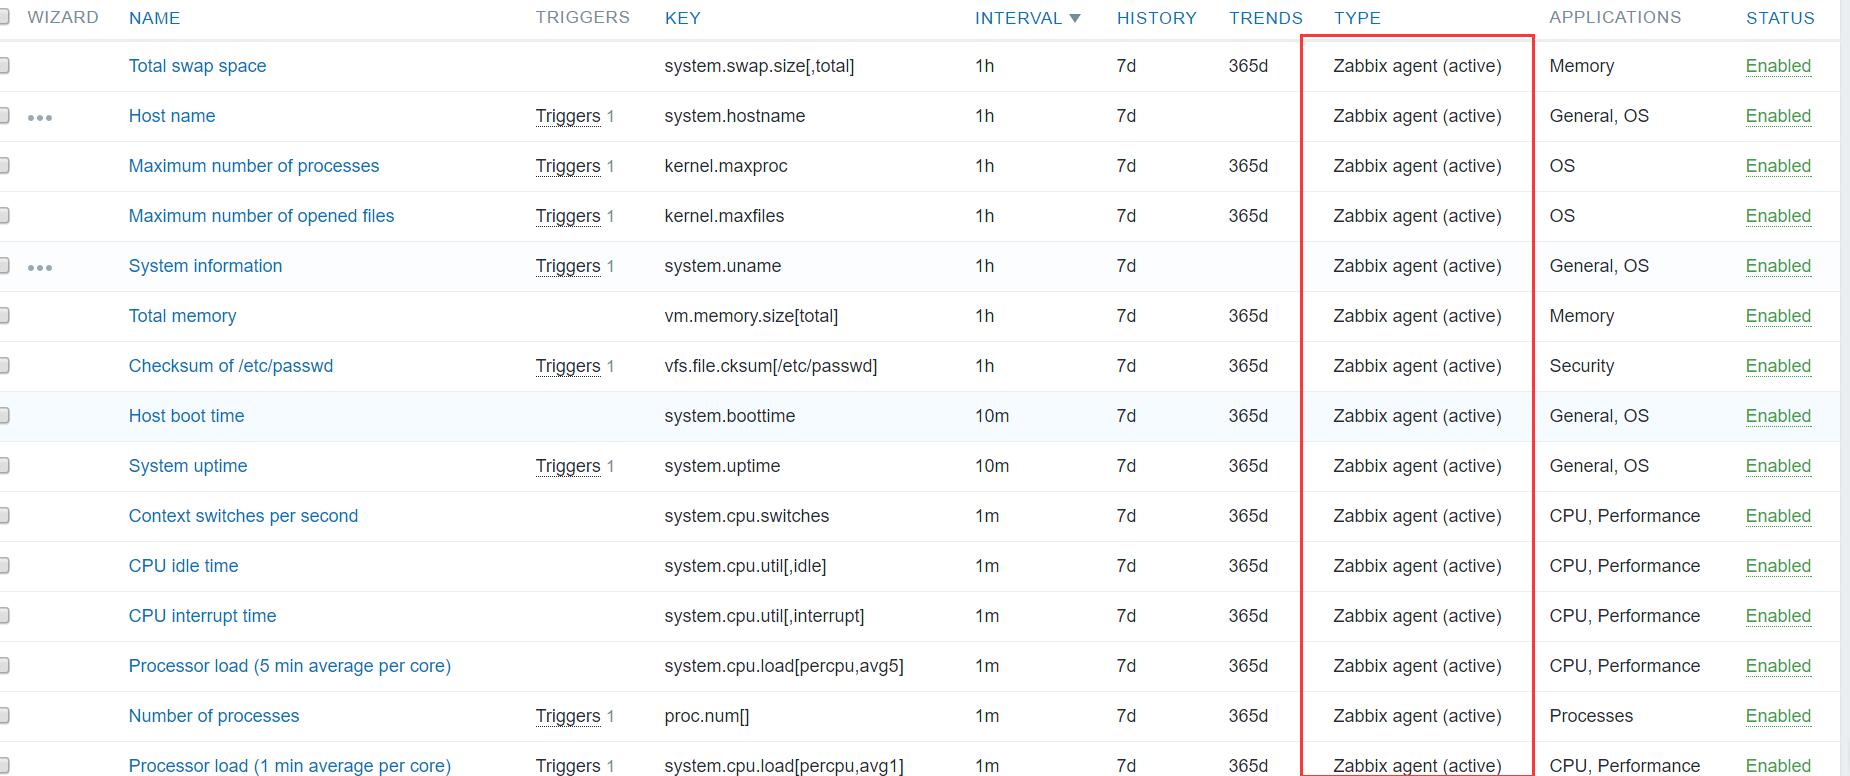
2.打开Template OS Linux Active模版 ==> 打开items选项 ==> 勾上WIZARD选项,全选所有items ==> 点下边Mass update,批量更新 ==> 勾上Type,选择Zabbix agent(active) ==> update保存

注意:主动模式模版链接的模版也必须是主动模式模版!
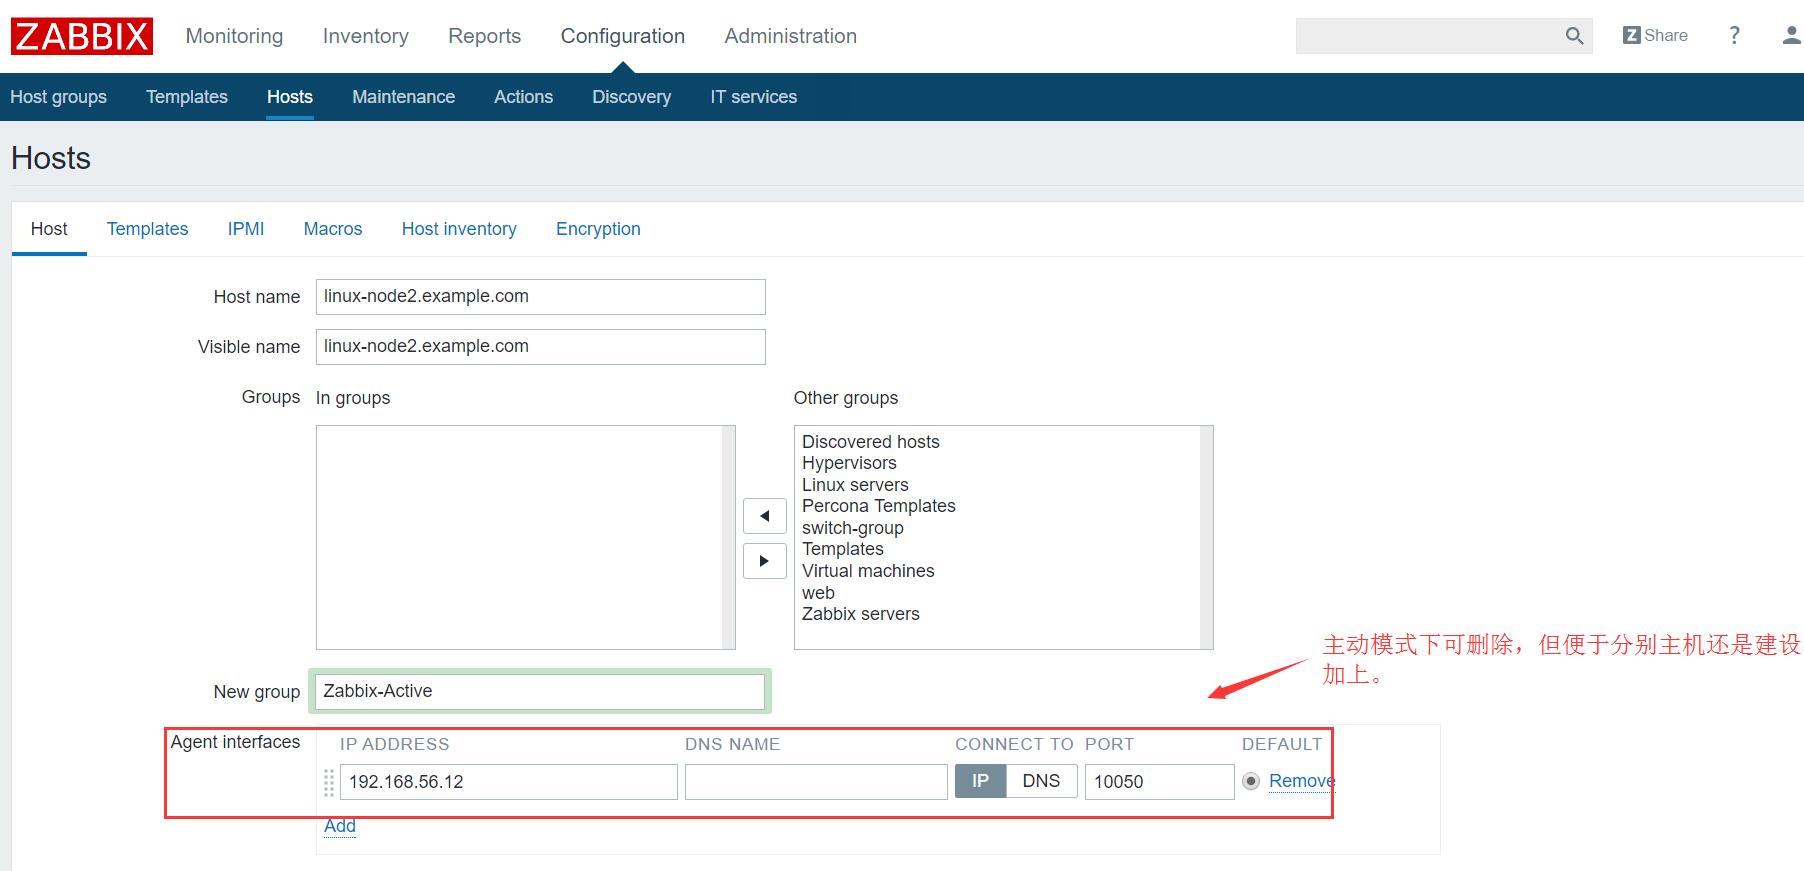
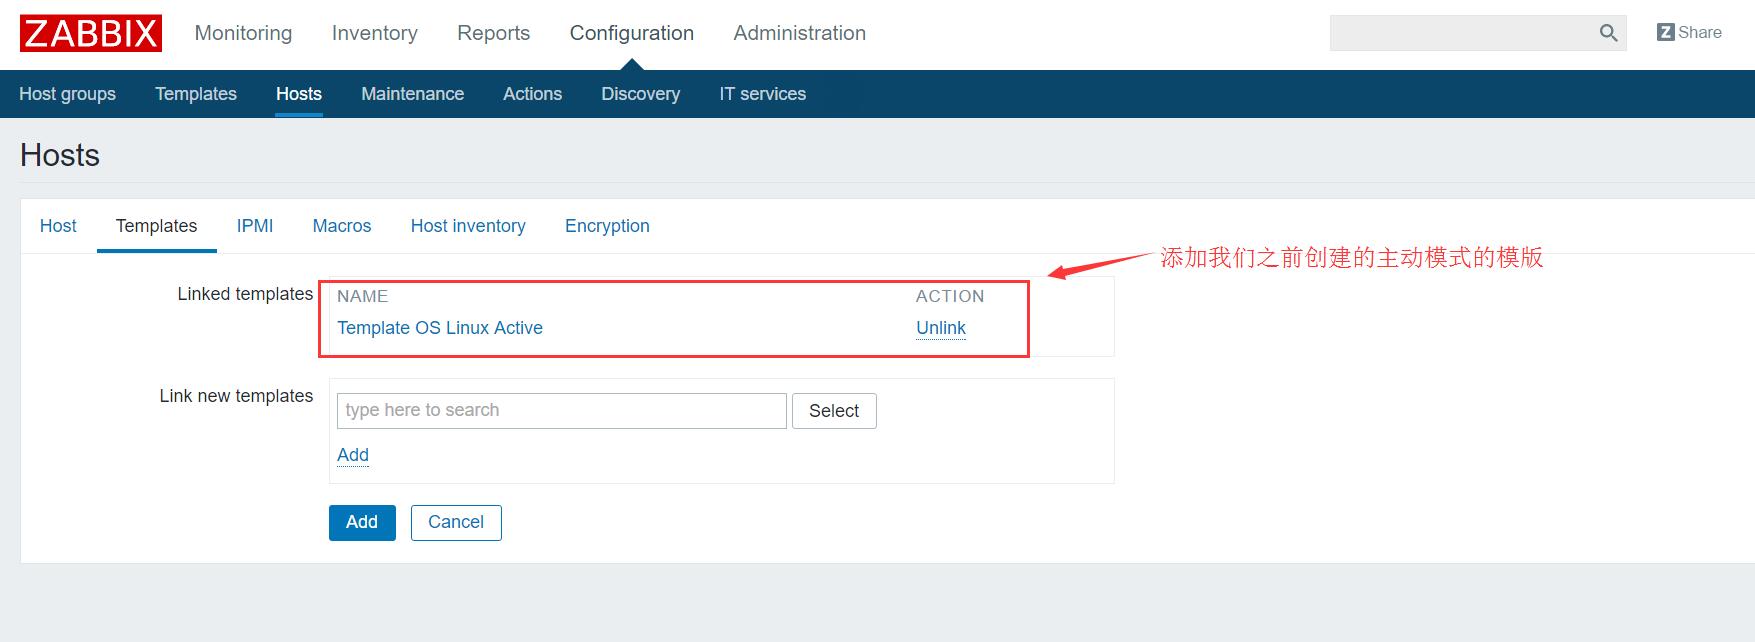
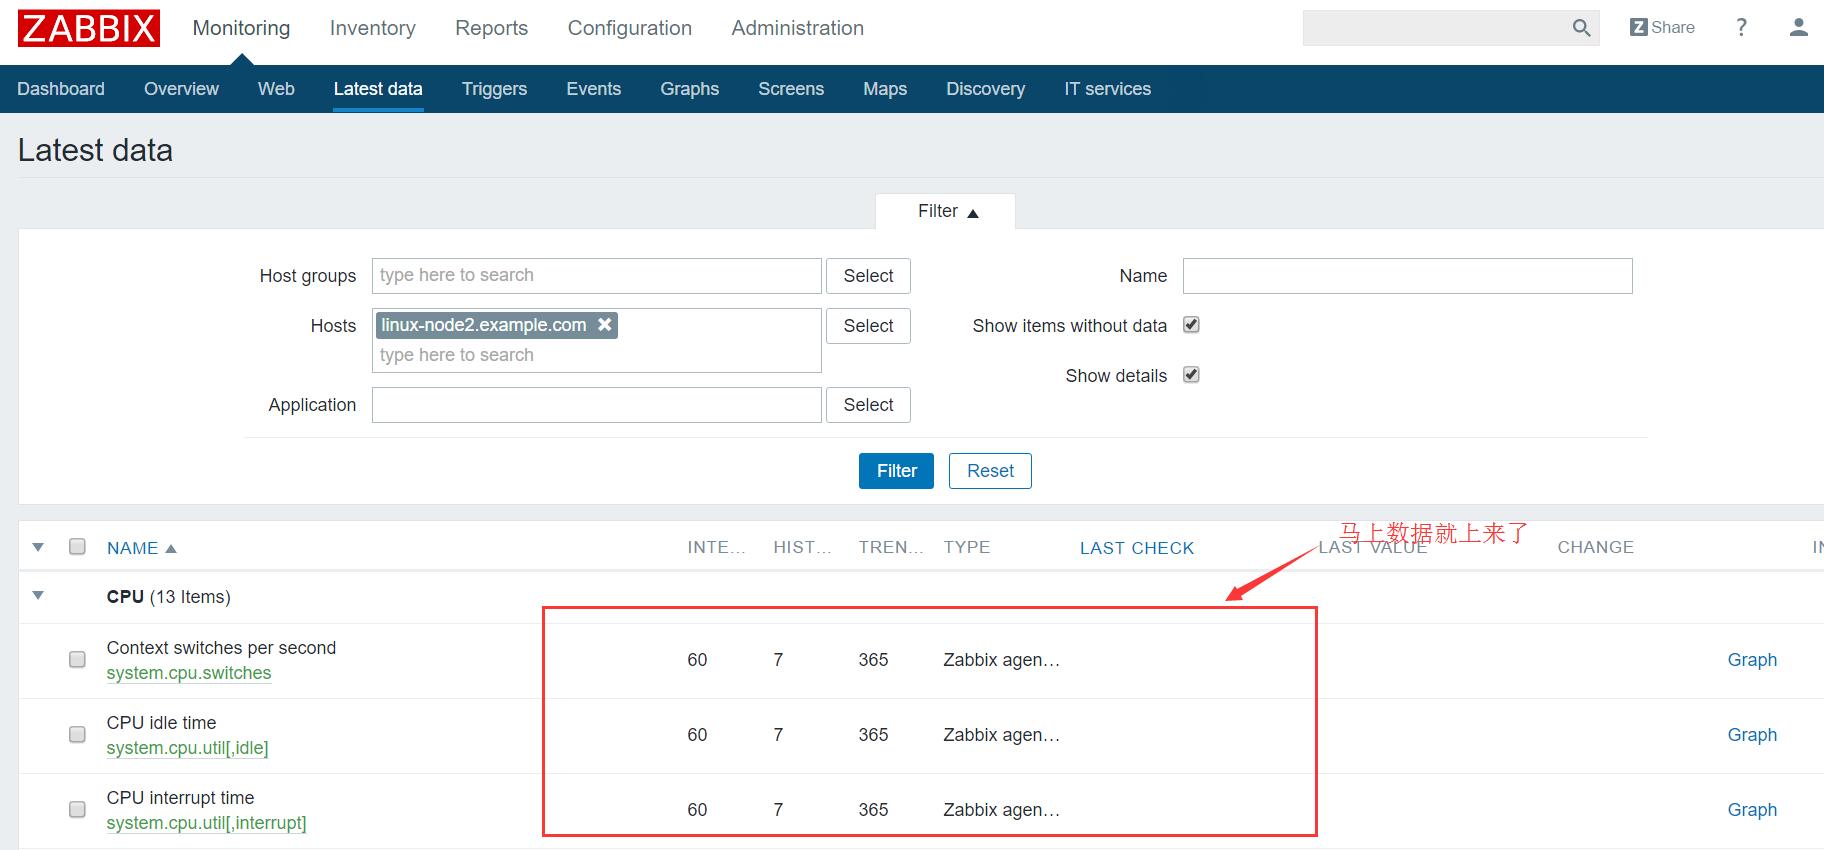
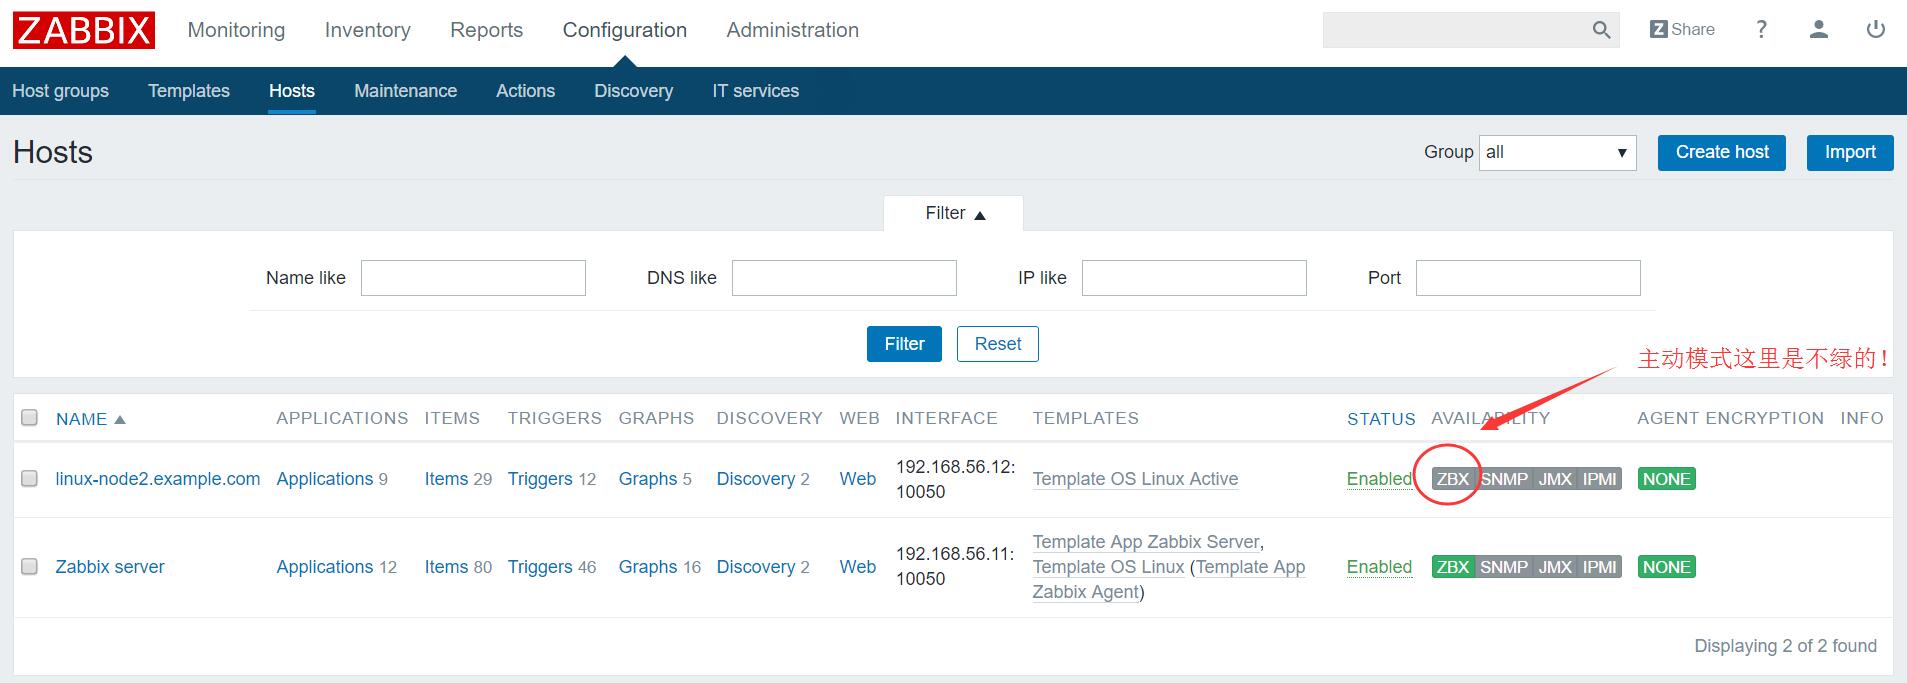
3.Server端添加主动模式的主机
